I’ve been having trouble with the driver’s side power window on my 2007 Mazda3 for a while. The window would go down, but wouldn’t go back up. Researching the problem online, this is a super common issue, but the suggested fixes are to replace whole assemblies, slam the door hard (to release a jammed mechanism), or to ‘recalibrate’ the motor controller.
I was able to fix it for zero cost so I am documenting the solution online here in the hope that it will help others: Completely disassemble the switch assembly, and then apply some pencil (graphite) to the contact pads of the tactile membrane switch. It’s an old trick, and this perfectly fixed my issue, was very quick and simple, and cost nothing, so I am documenting it here. More detail/pics below:
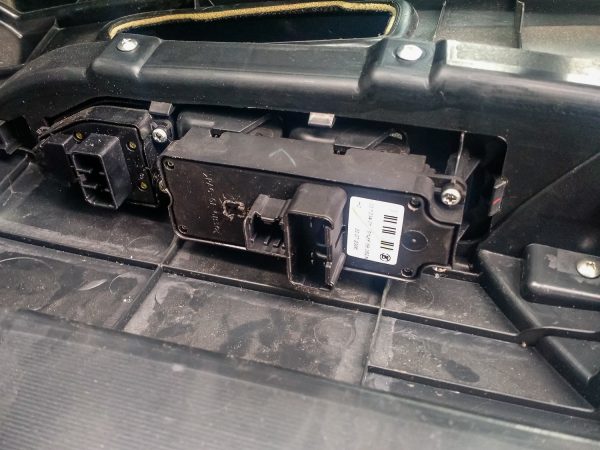
Here is the switch assembly inside the door. Removing it from the door is really straightforward, and you can easily find videos online. The TL;DR to getting at the switch assembly is to remove two screws (one from the arm rest, one from the door handle) from the door panel, then run your hand around the lip/edge of the door panel, popping off the 9 clips. Then the entire inner door can be lifted ‘up’ and ‘out’.
Here is the power window switch assembly (part number ‘BN8F 66 350A’) still inside the handrest.
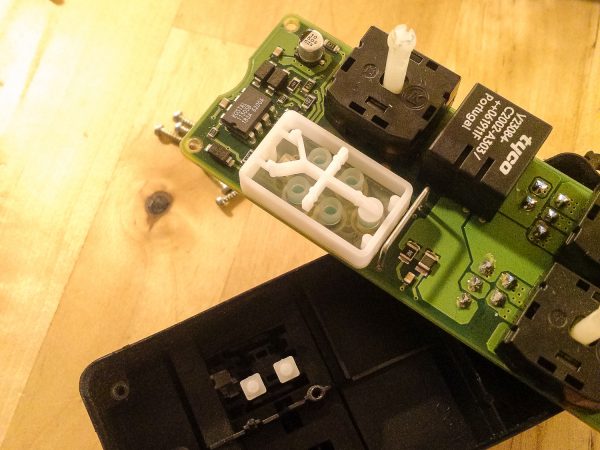
After removing and disassembling the switch unit further, we can see that the driver’s side switch is actually a different design to all the others (explaining why it was the only one to fail) – instead of being a sealed rocker switch, it has an unual design; the two white ‘feet’ of the rocker switch (visible in the botton of this photo) mechanically connect and push down onto some silicone-like bosses and there is an additional living hinge built into the whole thing which pushes down on the fifth tactile membrane switch:
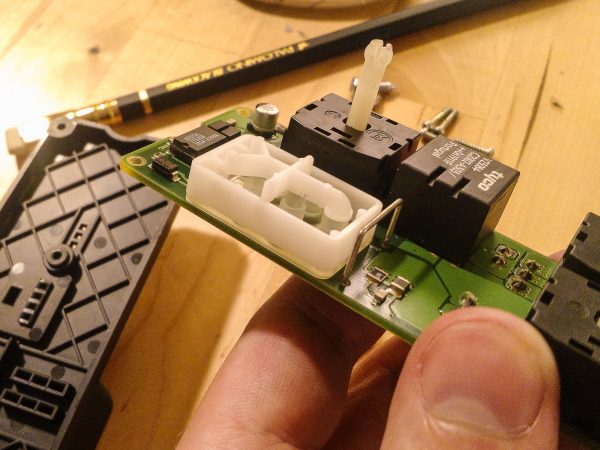
Here is a side view. The white plastic assembly can just be lifted right off the PCB:
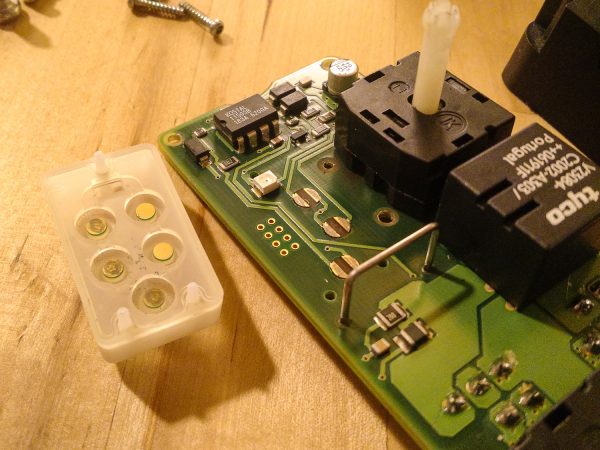
Here is a shot showing the underside of the plastic assembly and the pads on the PCB. Usually in this type of switch the pads are made of graphite-loaded silicone, but these are just gold-plated and didn’t appear to have any oil or anything else on them, so I just applied the graphite, tested, and reassembled.
After putting in back together, I had to take it back out to the car and plug it in to the wiring loom to test. Because the driver’s window switch has an ‘auto’ function, there is some latching logic (the IC visible on the PCB) which needs a supply voltage to operate (and drive the relay coil), so it’s not possible to test via the connector pins using a multimeter, and the PCB has a conformal coating so the tracks can’t be easily probed.
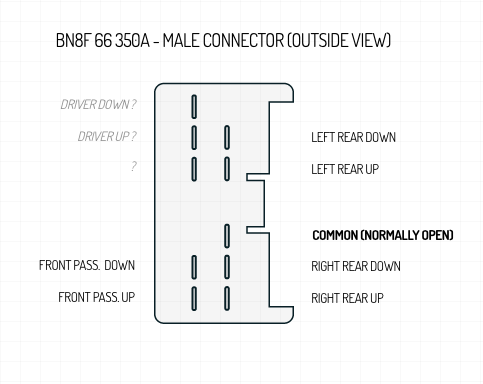
I didn’t see any pin-out diagrams for this connector so I have made one, below, but I took a guess at the driver’s side pins. I would guess that the other pin (labelled as ‘?’) is for the board’s power supply.
Leave a Reply